If you are interested in a kitchen design that provides ample space along with a good working flow, a U-shaped kitchen can be your best bet.
Yes, you can even have a U-shaped kitchen design with a breakfast bar. When designing a kitchen layout, you should take the space into consideration.
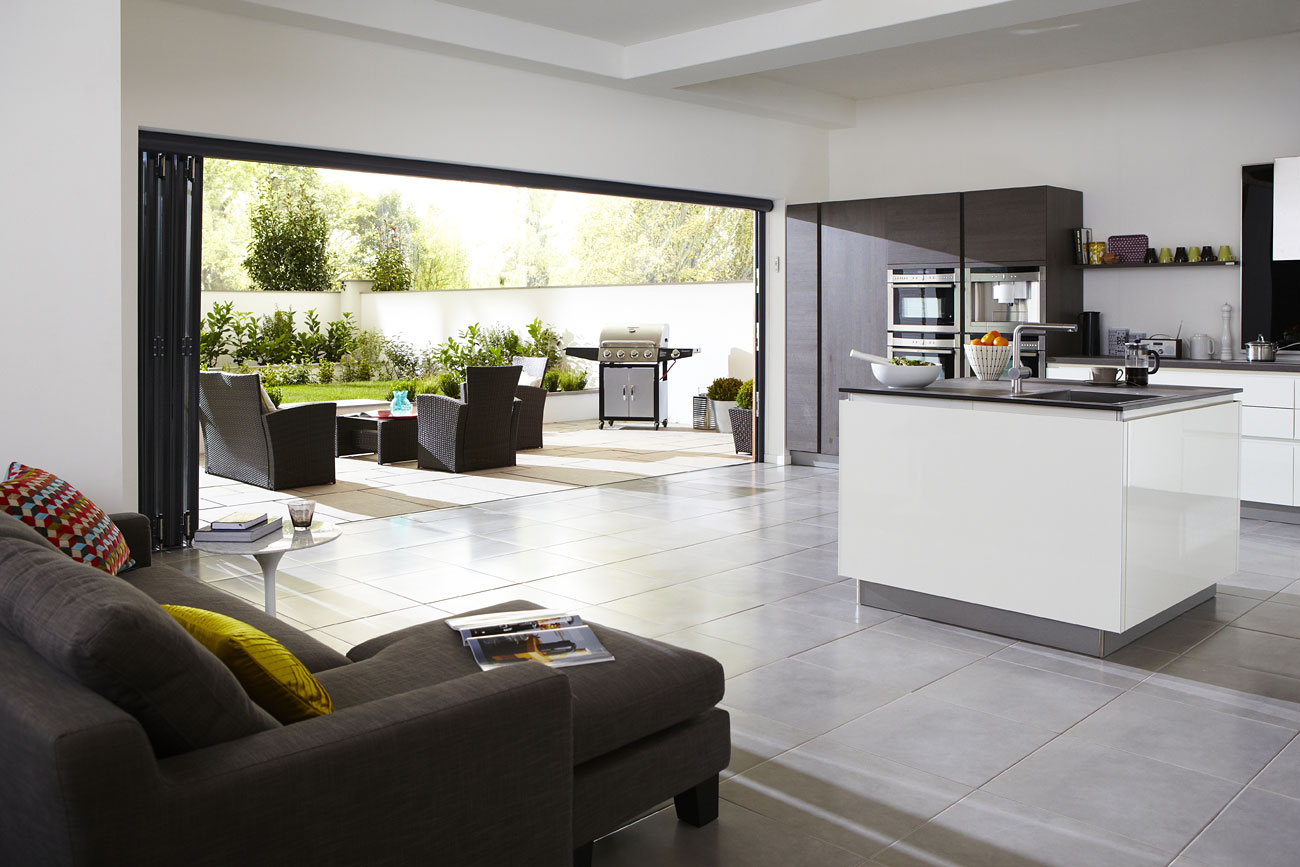
U Shaped Kitchen Designs with Breakfast Bar
It can help you decide what kind of layout that will suit you best. It will feel so wrong if a kitchen is built based only on your desire without considering the space.
We have to admit that the kitchen’s shape influences its beauty and efficiency. A kitchen can be built with plenty of designs that are meant to ease the owner’s task, from cooking, storing, to cleaning.
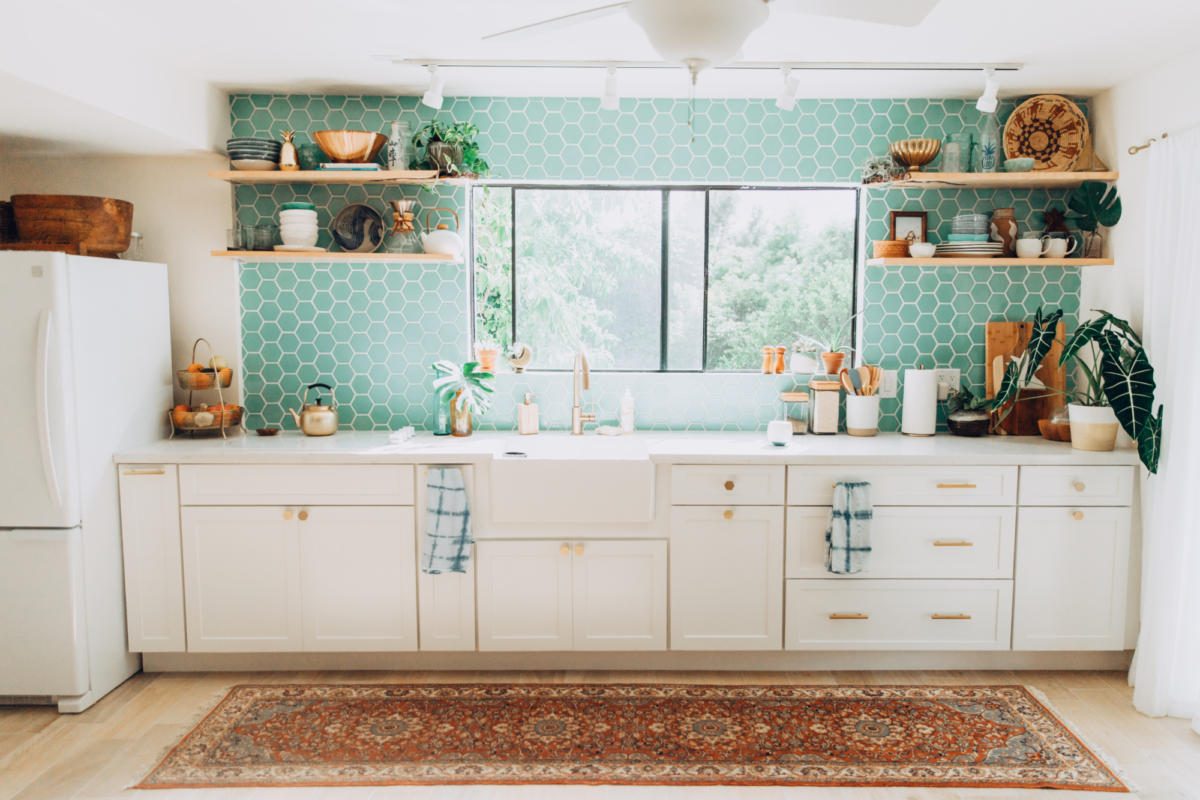
A u-shaped kitchen has three ample spaces, one of which is a perfect place for creating a breakfast bar. Give the countertop a nice overhang and some chairs. It is to create a breakfast area in the kitchen.
The breakfast bar can have two or more chairs, depending on how wide the kitchen space is.
The bar would not bother the flowing movement in the kitchen, as it is located to one side close to the wall. You can also have an island in the middle of the U-shaped kitchen if necessary.
Adding an island in the center is optional. It is just an additional feature, as long as it does not affect the workflow in the kitchen.
You can have one wall, galley, L-shaped, U-shaped kitchen, or even a Pandora kitchen design. It can be combined with many different styles from traditional to modern kitchen styles as well.

Pros and Cons of U-shaped Kitchen
A U-shaped kitchen can also maximize the storage space as it offers plenty of storage for a compact room.
Leaving the kitchen walls free from cabinets is suggested if you apparently have compact space. It can make the kitchen appears to be visually spacious.
This idea works just fine especially for a kitchen area with a sloping ceiling or angled walls.
Nevertheless, you can have some open shelves on the walls as they can pretty much decorate the kitchen, which also works for storing kitchen stuff such as dishes, glasses, and plates.
Pros
- A u-shaped kitchen offers some more space as it has three countertops, which benefit you to do lots of tasks at once
- You can finish your task faster as there is more than enough space that allows your partner to help you prepare the meals
- It can save you from bumping your partner when entering the kitchen area if it has the minimum space requires
Cons
- A U-shaped kitchen calls for the minimum width to make the kitchen fully functional. If you happen to have tiny space, consider having another kitchen layout
- The space left in the kitchen will also get reduced by kitchen property such as cupboards and chairs
Make a Splash
The kitchen is dubbed as the heart of the house – the place in which many magical things happen.
It is the place where you have your breakfast with the family every morning, so it is not wrong to decorate it with a nice touch from the layout, ceiling, walls, and lighting ideas.
Making the backsplash to have a pretty surface can be an alternative way to decorate the kitchen.
You can apply a certain type of tiles that improve the kitchen look or you can apply some colors that can bring a comfortable atmosphere.
Make sure that the idea can integrate with all of the elements in the kitchen, not just a mismatch that turns the look of the kitchen ugly.
There you will have an astonishing area in the kitchen you can enjoy while working or cooking in the kitchen.
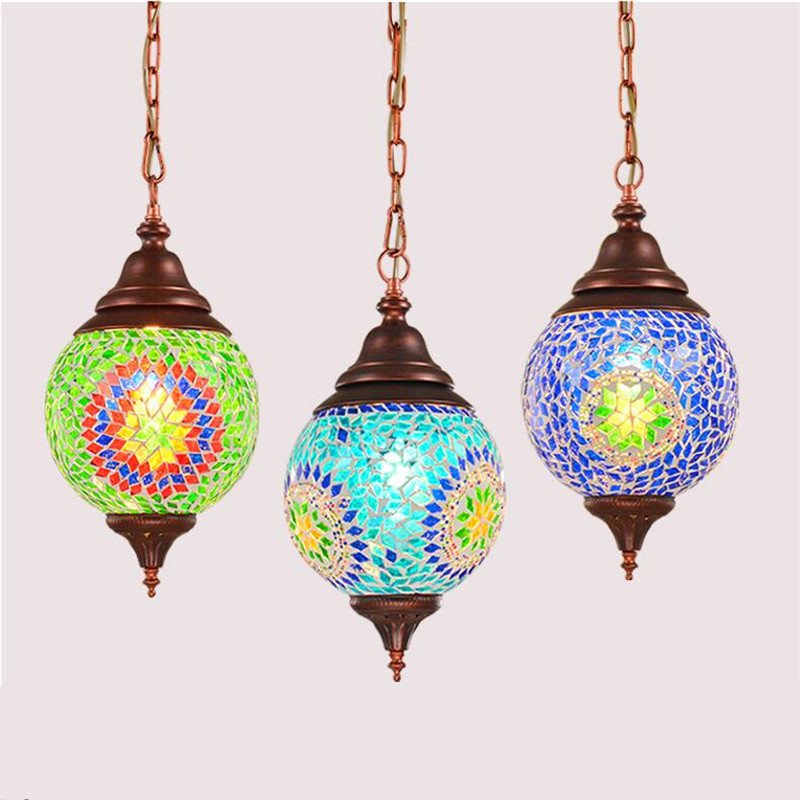
How Should a Lighting Idea Be?
Deciding a lighting idea can be matched with the surrounding area. Lighting ideas can pretty much enhance or destroy the entire kitchen look.
Be wise when designing and choosing the lamps, and make sure that they will go along with the entire kitchen.
Although it is often considered as the last feature when designing a kitchen, illumination holds a crucial point for the kitchen look.
With a proper kitchen lighting idea, you can highlight a specific kitchen area that you want people to pay attention to.
An appropriate kitchen lighting idea can give you some advantages such as providing sufficient light and shade-free, which helps for preparation work, safe cooking, and stuff.
It can also be an effective means to create a good ambiance.
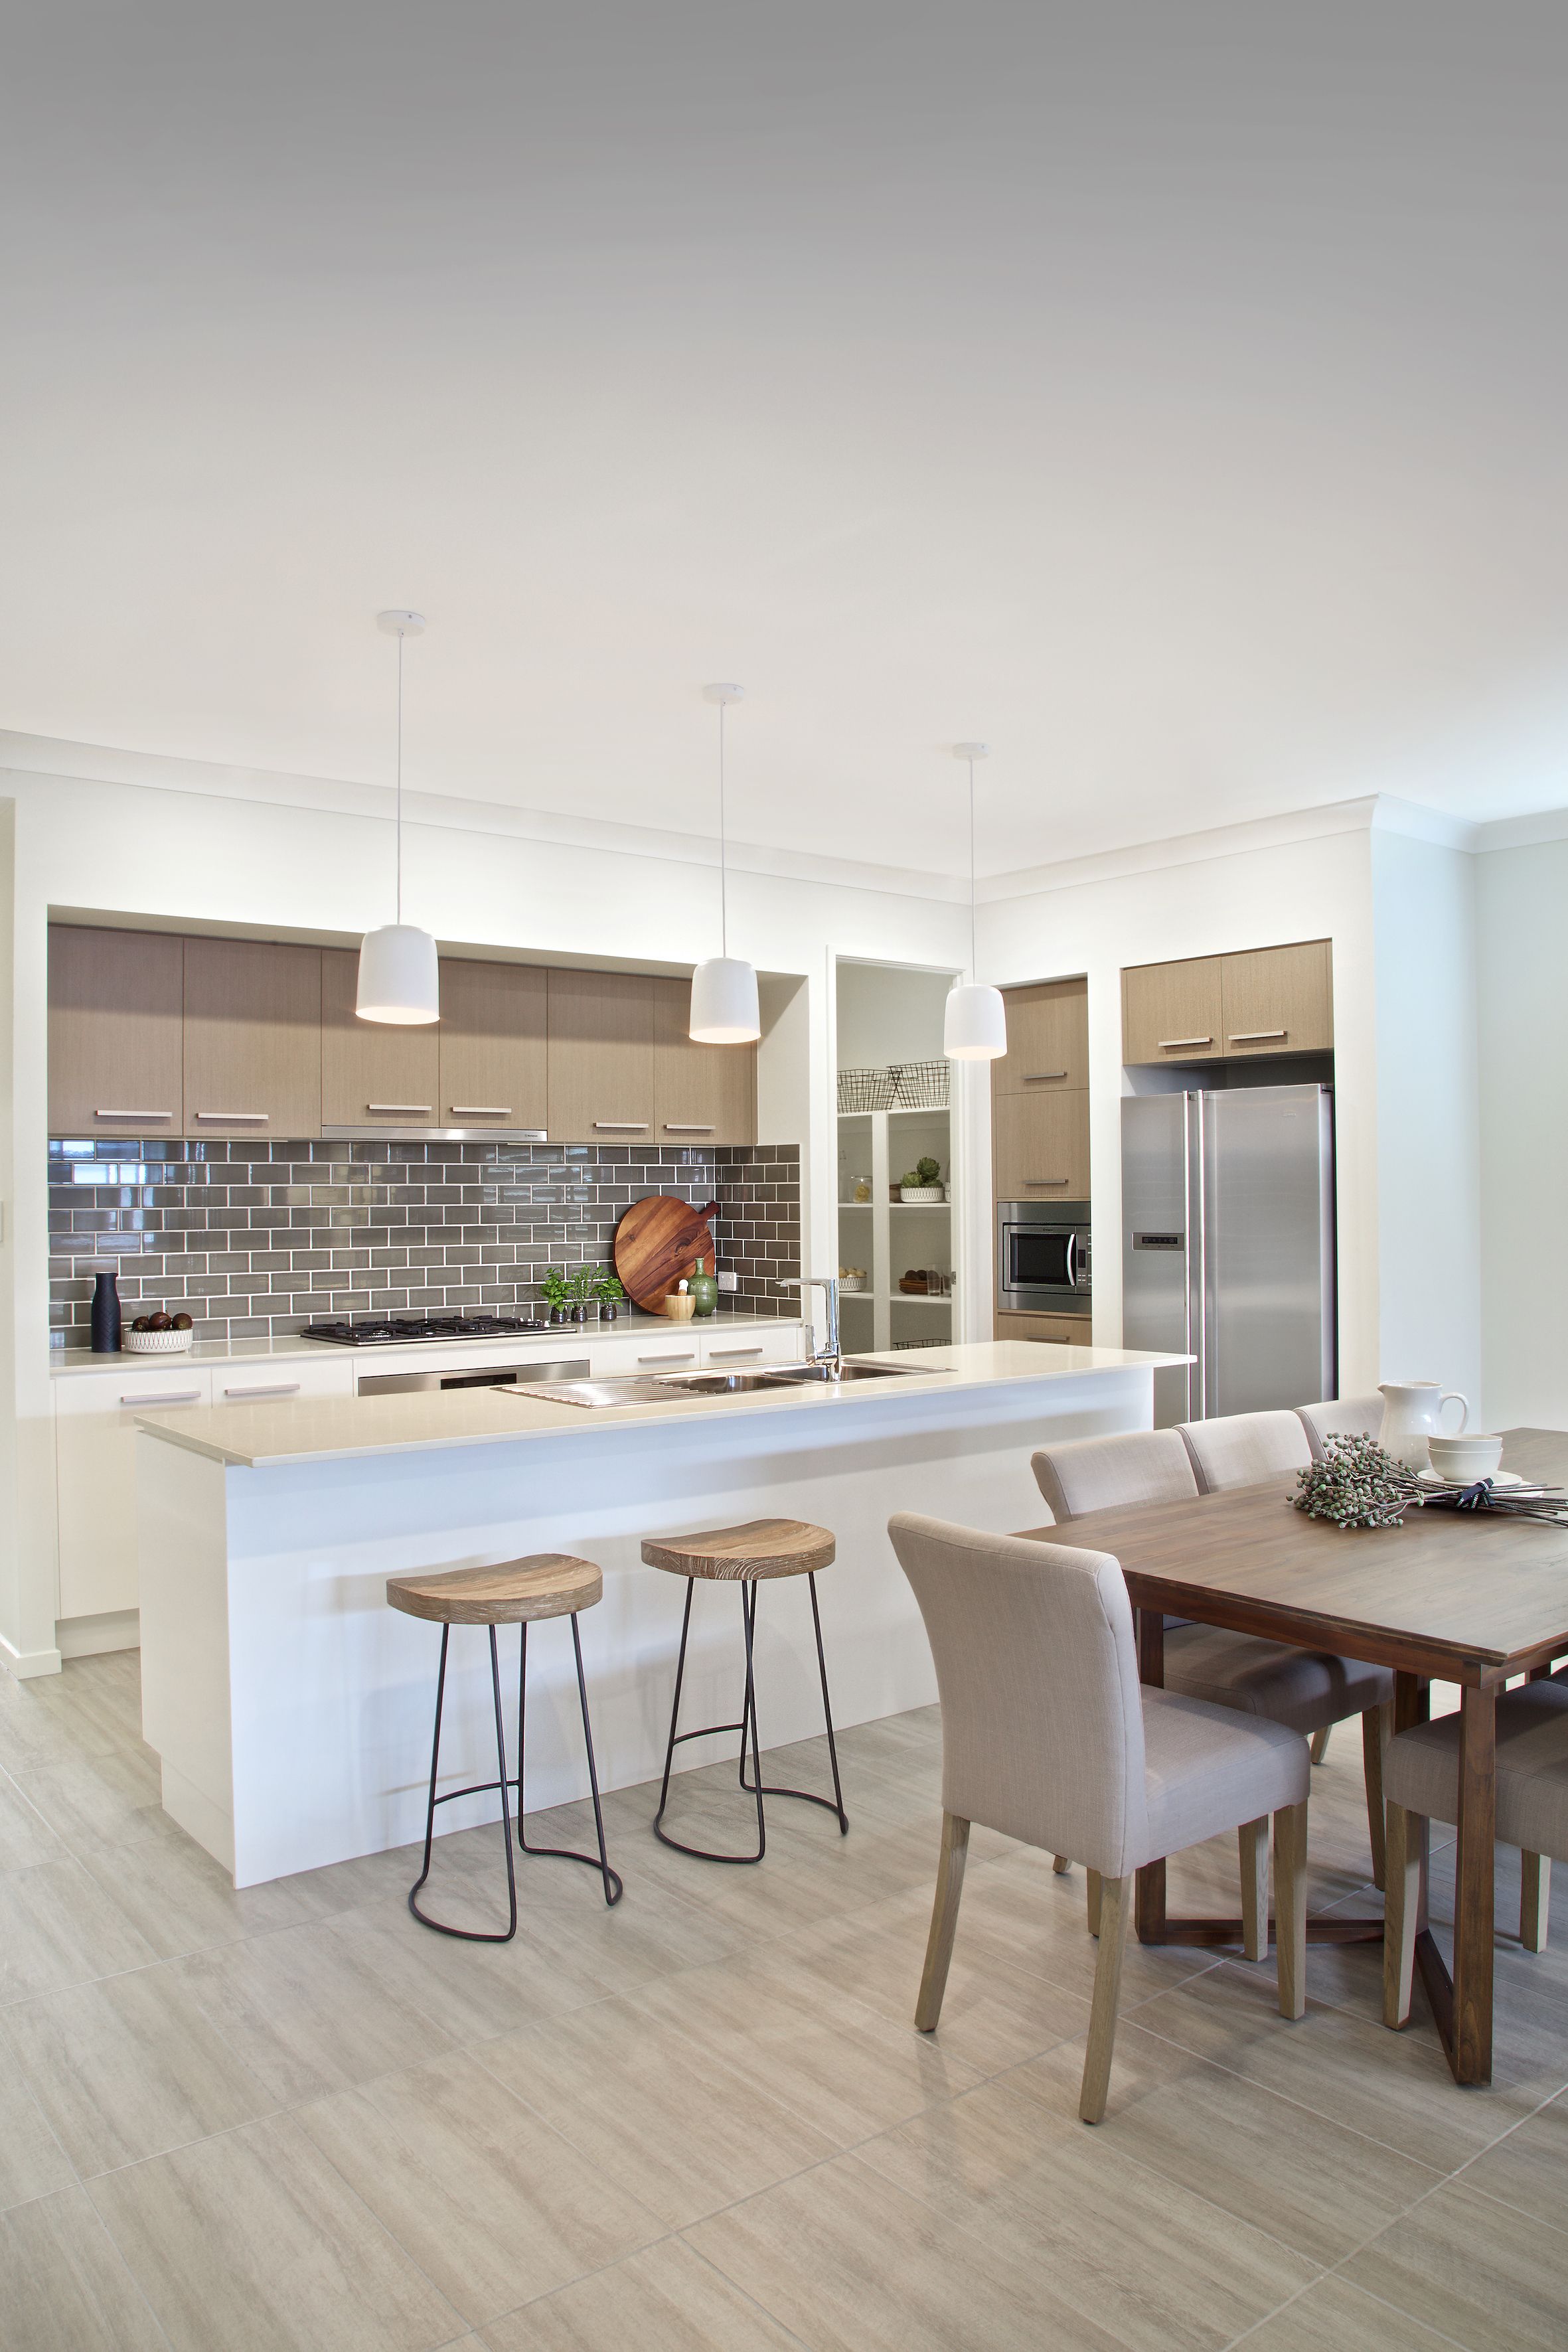
- Some areas that need task lighting, including the kitchen sink, above the hob, and food preparation counter. They call for bright lighting to ease kitchen tasks.
- There’s also an area that requires comfortable or soft lighting such as seating or dining area, on which you just want to enjoy the meal while having a nice chat under the light
..
U-shaped kitchen design with breakfast bar will make the kitchen feel complete and fully functioned as every family member can build his or her intimacy stronger while having breakfast.